
Summary
If GibbsCAM displays an error similar to:
"The instruction at 0x00007FF... referenced memory at 0x00000000. The memory could not be read."
or
"The instruction at 0x00007FF... referenced memory at 0x00000000. The memory could not be written."
Windows has encountered a memory access violation while the application was running.
This error is not usually caused by defective RAM. More commonly, it is related to corrupted Windows system files, graphics drivers, third-party software conflicts, insufficient virtual memory, or damaged application components.
This article provides recommended troubleshooting steps to identify and resolve the issue.
Table of Contents
Symptoms
You may experience one or more of the following:
GibbsCAM crashes with a memory reference error.
An error appears stating "The instruction at 0x00007FF... referenced memory..."
GibbsCAM closes unexpectedly while opening, saving, or calculating toolpaths.
The error occurs randomly during normal operation.
Procedure
Step 1 – Run Windows System File Checker (SFC) and DISM
Corrupted Windows system files are one of the most common causes of memory access violations.
Open the Start menu.
Search for Command Prompt.
Right-click Command Prompt and select Run as administrator.
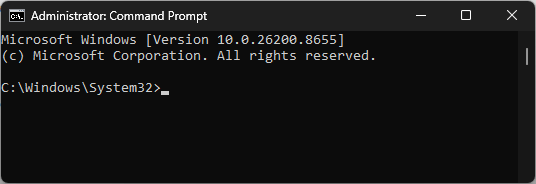
Run the following command:
sfc /scannow
Allow the scan to complete.
If Windows reports corruption that cannot be repaired, run the DISM repair commands as described in the Windows System File Checker (SFC) and DISM Repair article.
Restart the computer.
Expected Result
Windows repairs any corrupted operating system files.
Step 2 – Install Windows Updates
Ensure Windows is fully updated.
Open Settings > Windows Update.
Select Check for Updates.
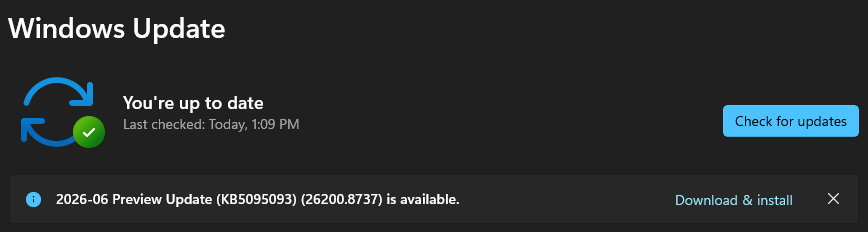
Install all available updates.
Restart the computer.
Repeat until Windows reports there are no remaining updates.
Expected Result
Windows is fully updated with the latest system components.
Step 3 – Update the Graphics Driver
Graphics driver issues frequently result in application memory access errors.
Determine your graphics adapter.
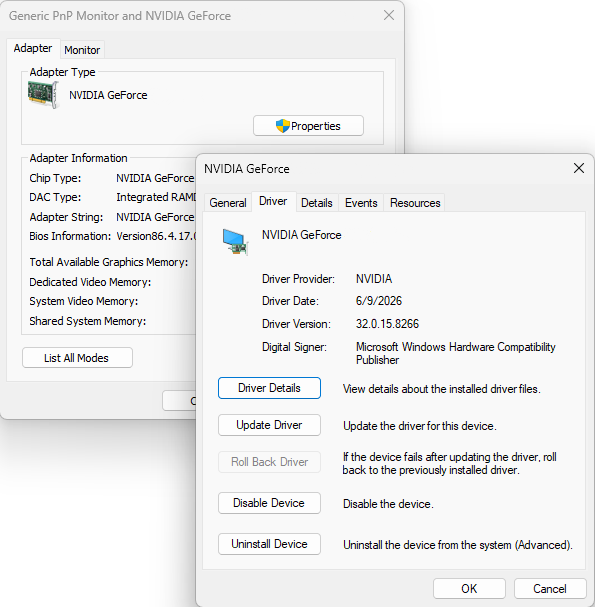
Download the latest driver directly from the NVIDIA or AMD website.
Install the updated driver.
Restart Windows.
Expected Result
The graphics subsystem initializes correctly.
Step 4 – Perform a Clean Boot
Third-party background applications can interfere with GibbsCAM.
Press Windows + R.
Type:
msconfig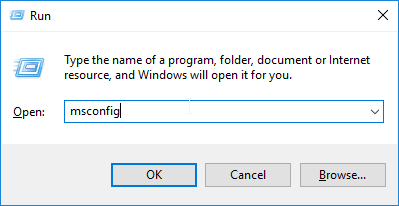
Press Enter.
Open the Services tab.
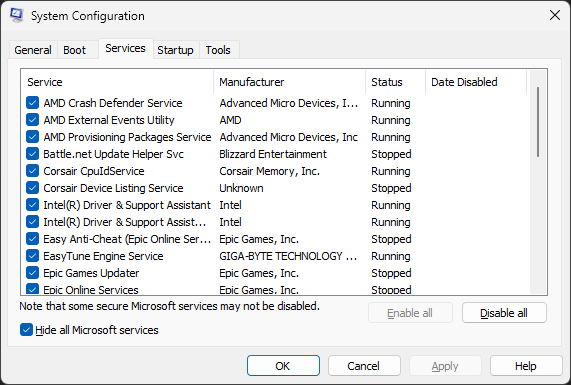
Check Hide all Microsoft services.
Select Disable all.
Restart the computer.
Test GibbsCAM before re-enabling services.
Expected Result
If a background application was causing the problem, GibbsCAM operates normally.
Step 5 – Verify Virtual Memory
Windows virtual memory (page file) supplements physical RAM.
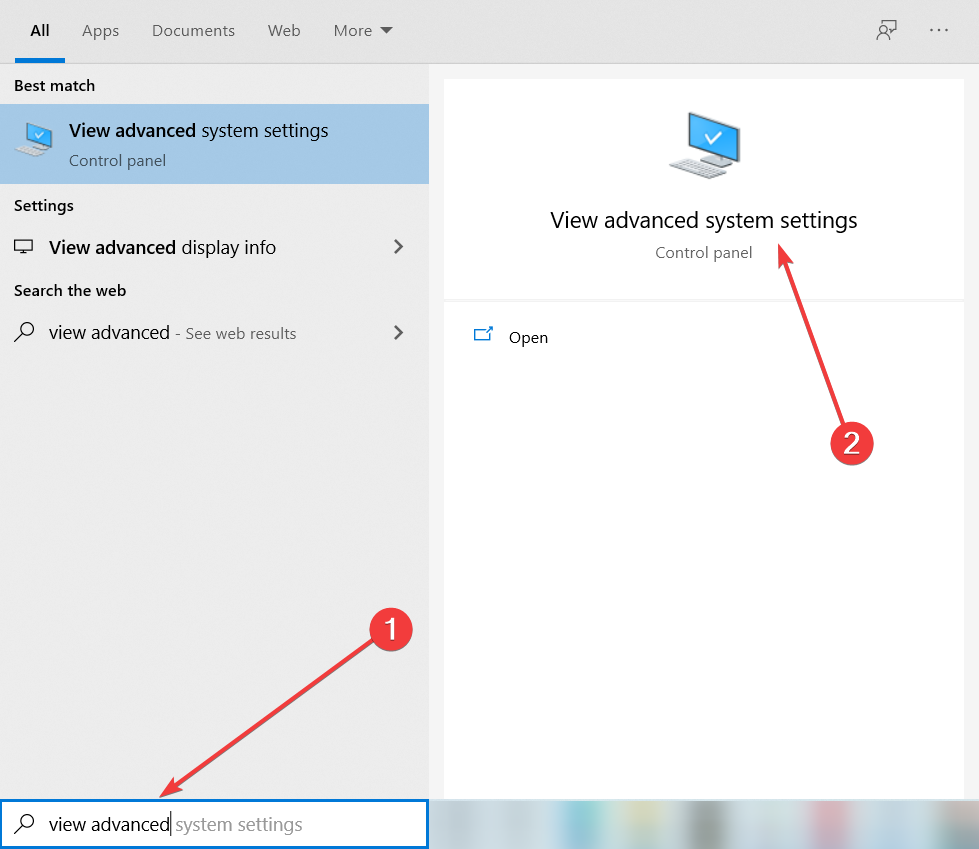
Open View advanced system settings.
Select the Advanced tab.
Under Performance, select Settings.
Open the Advanced tab.
Select Change under Virtual Memory.
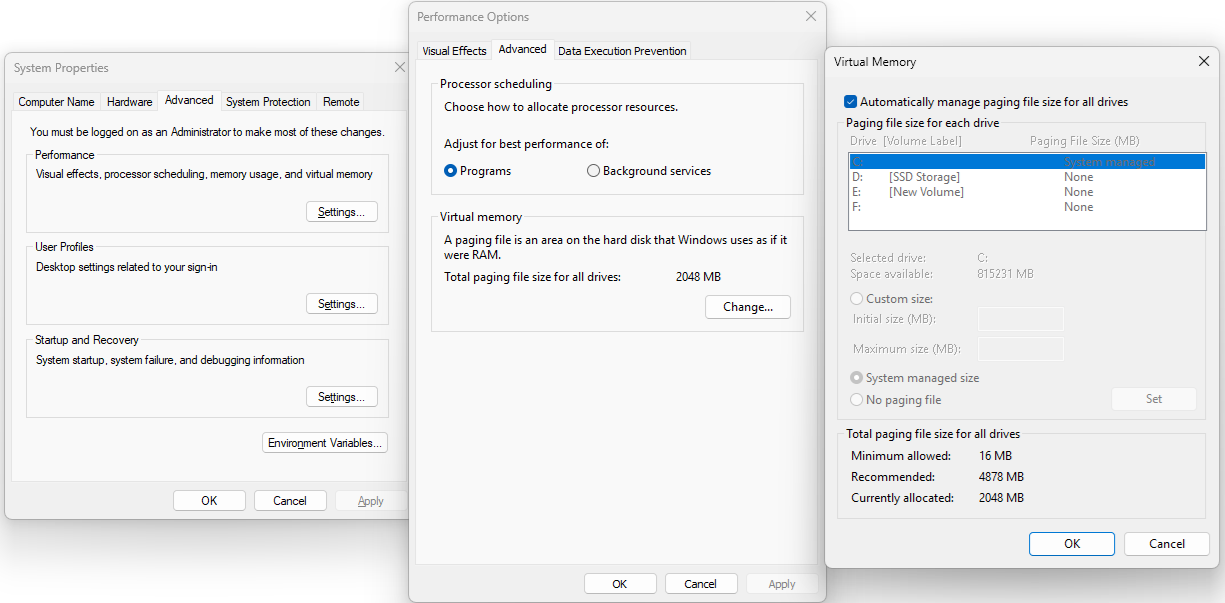
Verify that virtual memory is enabled.
CAMCO recommends allowing Windows to Automatically manage paging file size unless your IT department has specific requirements.
Expected Result
Windows has sufficient virtual memory available.
Step 6 – Scan for Malware
Malware or unwanted software can interfere with Windows memory management.
Run a full scan using your organization's approved antivirus or Microsoft Defender.
Expected Result
The system is confirmed free of malicious software.
Step 7 – Run the GibbsCAM Recovery Tool
If the issue is limited to GibbsCAM:
Close GibbsCAM.
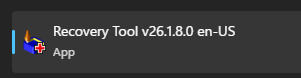
Launch the Recovery Tool for your installed version from the Windows Start menu.
Alternatively, run the tool directly from:
C:\Program Files\Gibbs\GibbsCAM\<version>\Bin\Recovery Tool.exe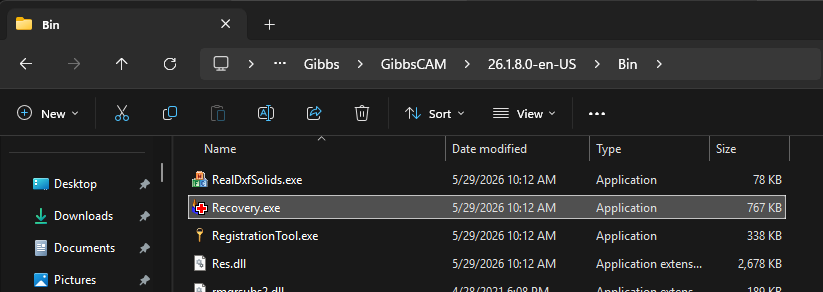
Restart GibbsCAM.
Note: The Recovery Tool resets GibbsCAM user preferences to their default settings.
Expected Result
Corrupted GibbsCAM preference files are removed as a possible cause.
Step 8 – Test System Memory
If the error persists across multiple applications, test the computer's physical memory.
Run Windows Memory Diagnostic or your organization's preferred hardware diagnostic utility.
Expected Result
Any defective RAM modules are identified.
Expected Result
GibbsCAM operates normally without displaying memory reference errors.
Additional Information
Common Causes
This error is commonly associated with:
Corrupted Windows system files.
Outdated or incompatible graphics drivers.
Third-party software conflicts.
Corrupted GibbsCAM user preferences.
Insufficient or improperly configured virtual memory.
Malware.
Faulty system memory (less common).
Best Practices
Keep Windows fully updated.
Install graphics drivers directly from the GPU manufacturer.
Allow Windows to manage virtual memory automatically unless directed otherwise by IT.
Periodically run Windows health checks using SFC and DISM.
Keep GibbsCAM updated to the latest supported release.
Note: While this error is frequently described as a "RAM error," physical memory failure is only one of several possible causes. Software and driver issues are considerably more common.
Troubleshooting
Problem: The error only occurs in GibbsCAM.
Possible Causes
Corrupted GibbsCAM preferences.
Graphics driver compatibility.
Corrupted installation.
Resolution
Run the Recovery Tool. If necessary, repair or reinstall GibbsCAM.
Problem: The error occurs in multiple applications.
Possible Causes
Corrupted Windows installation.
Faulty RAM.
Third-party software conflict.
Resolution
Run SFC, DISM, Windows Memory Diagnostic, and perform a Clean Boot to isolate the cause.
Problem: The error began after installing new hardware or drivers.
Possible Causes
Incompatible or unstable device drivers.
Resolution
Update, roll back, or reinstall the affected drivers and verify system stability.
Related Articles
- Troubleshooting GibbsCAM Crashes, Freezes, or Unexpected Closures
- Run Windows System File Checker (SFC) and DISM Repair
- Error: "Out of Memory"
- Error: LoadLibrary Failed with Error 87
- Error: LoadLibrary Failed With Error 1114
Explore More from CAMCO
Visit the CAMCO website to learn more about:
Technical & Post Support
- Downloads & Helpful Resources
Keywords
The instruction at 0x00007FF, Referenced Memory, Memory Could Not Be Read, Memory Could Not Be Written, Access Violation, Memory Error, Crash, SFC, DISM, Virtual Memory, RAM, Windows Memory Diagnostic