
Summary
A VoluMill operation using Material Only can appear to cut air when the stock contains an undercut, overhang, or lip. GibbsCAM 3-axis milling processes do not recognize undercut stock, so the remaining-material calculation cannot independently represent the empty space beneath an overhanging feature.
For a part with a lip, split the cut into two ordered VoluMill processes. Set the first process to cut from the top through the bottom of the lip, then use a second process for the area below it with Material Only enabled. The second process recognizes the material removed by the first 2D operation and calculates from that updated remaining-material state.
Table of Contents
- Before You Begin
- Why Material Only Cuts Air Around an Undercut
- Procedure
- Best Practices
- Troubleshooting
- Related Articles
Before You Begin
Open the GibbsCAM part and save a backup copy before changing process depths, stock options, or operation order.
Confirm that the apparent air cutting occurs around an undercut, overhang, flange, shoulder, or lip in the stock or part shape.
Verify that the active stock, part solid, coordinate system, workgroup, tool, holder, and setup are positioned correctly.
Identify the exact Z level at the bottom of the lip and the final depth required below it.
Confirm that the upper and lower regions can be machined safely as separate 3-axis VoluMill operations.
Use compatible 2D operations in the ordered process sequence; remaining material is not stored from 3D operations such as Lace, Surface Flow, or 2 Curve Flow.
Plan to regenerate, simulate, post, and prove out the complete operation sequence after the change.
Important: No GibbsCAM 3-axis milling process recognizes undercut stock. Material Only does not reconstruct an undercut stock volume from the model; it calculates from the remaining material recorded by supported prior 2D operations.
Why Material Only Cuts Air Around an Undercut
Material Only is a remaining-material strategy. It calculates where material remains after earlier supported operations, but the 3-axis stock representation is evaluated from the machining direction and does not preserve an independent undercut volume beneath an overhang. A lip can therefore make an empty lower region appear as if stock is still present, producing toolpath in air.
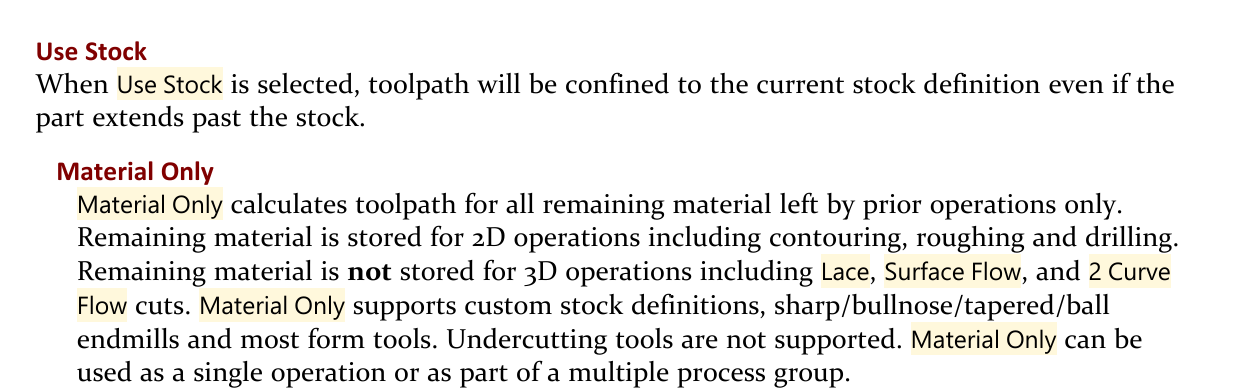
Figure 1 - Use Stock and Material Only behavior in the GibbsCAM 2026 VoluMill documentation.
Procedure
Step 1 - Confirm the Undercut-Stock Condition
Display the part and stock from several views and identify the lip or overhang that creates empty space beneath it.
Run or review the current VoluMill toolpath and locate the moves that pass through already-empty space.
Confirm that the issue is not caused by an incorrect stock body, unselected part solid, wrong coordinate system, stale operation, or hidden stock component.
Record the Z coordinate at the bottom of the lip and the final lower machining depth.
Expected Result
The cutting-air region is associated with an undercut-stock condition, and the depth boundary for separating the two operations is known.
Step 2 - Create the Upper VoluMill Process
Create or edit the first VoluMill process for the upper region of the feature.
Use the correct geometry or solid selection, stock definition, tool, allowances, and open-side settings for the upper cut.
Set the first process's final depth so it cuts just through the bottom of the lip. Use only the approved amount of overlap needed to establish a cleared region below the lip.
Verify that the upper process does not extend into protected geometry or remove material intended for the lower process.
Expected Result
The first process removes material from the top through the bottom of the lip and establishes a clear transition into the lower region.
Step 3 - Generate the First Operation
Place the upper VoluMill process before the lower process in the Process list.
Generate the upper process and inspect the toolpath through its final depth.
Verify that it is a supported 2D operation whose remaining material will be available to the following Material Only calculation.
Keep the generated upper operation active and ahead of the lower operation when recalculating the process sequence.
Expected Result
GibbsCAM has a valid prior 2D operation that records the material removed through the lip depth.
Step 4 - Create the Lower Material Only Process
Create a second VoluMill process for the machining region below the lip.
Set its top and bottom depths so the operation begins at or just below the depth cleared by the upper process and continues to the required lower floor.
Use the same setup and coordinate system, and select the appropriate lower-region geometry or solid input.
On the VoluMill page, select Material Only in the Stock Options area.
Confirm that the lower process follows the upper process and that no unrelated operation interrupts the intended remaining-material sequence.
Expected Result
The second process is depth-limited to the area below the lip and is configured to use material remaining after the first operation.
Step 5 - Generate and Inspect the Lower Operation
Generate the upper and lower processes in their intended order.
Inspect the lower Material Only toolpath and compare it with the stock state created by the upper operation.
Confirm that the lower process no longer calculates unnecessary passes in the area cleared through the lip by the first operation.
Review entries, exits, high-feed repositioning moves, wall and floor allowances, islands, and clearances for both processes.
If either process changes, regenerate the ordered pair so the lower remaining-material calculation stays synchronized.
Expected Result
The lower VoluMill operation follows the updated remaining-material state instead of treating the entire undercut region as uncut stock.
Step 6 - Simulate and Verify the Complete Sequence
Run Op Simulation from the upper operation through the lower operation with the part, stock, tools, holders, and fixtures visible.
Pause at the lip transition and verify that the first operation clears the required path and the second operation begins below it as intended.
Check for remaining air cuts, gouges, collisions, excess stock, missed material, and unsafe links or repositioning moves.
Post the complete sequence and confirm operation order, depths, tool numbers, offsets, feeds, speeds, and clearance moves.
Resolve every discrepancy, then follow the shop's approved single-block, dry-run, and prove-out procedures before production machining.
Expected Result
The two-operation sequence safely machines through and below the lip, and the lower Material Only operation matches the verified remaining stock.
Expected Result
The first VoluMill operation cuts from the top through the bottom of the lip and records the material it removed. The second VoluMill operation begins below that transition, uses Material Only, and calculates from the remaining material left by the first supported 2D operation. Unnecessary cutting-air passes are eliminated or substantially reduced, and the complete sequence passes simulation and posted-code review.
Best Practices
Treat undercut stock as a limitation of the 3-axis remaining-material model, not as a setting that Material Only can enable.
Use a clear Z boundary at the bottom of the lip when separating the upper and lower processes.
Allow only the approved overlap needed for the upper process to cut through the lip; excessive overlap can remove protected material.
Keep the upper 2D operation active and ahead of the lower Material Only operation.
Regenerate both processes whenever geometry, stock, tool, allowance, depth, or operation order changes.
Do not rely on prior 3D operations to update Material Only remaining stock.
Inspect the transition region from multiple views and with stock display enabled.
Review the posted program because graphics alone do not verify post-processor output or machine behavior.
Document the two-process workaround so future edits do not recombine the undercut into one unsupported 3-axis calculation.
Troubleshooting
Problem: The lower Material Only operation still cuts air beneath the lip.
Possible Causes
The first process does not cut through the full bottom of the lip.
The lower process starts above the cleared transition depth.
The upper operation is inactive, out of order, or was not regenerated before the lower operation.
The undercut shape is still being evaluated as one unsupported 3-axis stock condition.
Resolution
Confirm the lip-bottom Z level, extend the upper process only far enough to clear through it, start the lower process at the established transition depth, and regenerate the upper and lower processes in order.
Problem: Material Only ignores material removed by an earlier operation.
Possible Causes
The earlier operation is a 3D strategy whose remaining material is not stored for Material Only.
The earlier operation is inactive, below the current operation, or belongs to a different setup or coordinate system.
The operation sequence was changed without regeneration.
Resolution
Use a supported prior 2D operation such as contouring, roughing, drilling, or the upper 2D VoluMill operation. Restore the correct order and setup, then regenerate the complete sequence.
Problem: The upper process gouges the part at the lip transition.
Possible Causes
Its final depth extends too far below the lip.
The selected geometry, solid, wall, island, or stock allowance is incorrect.
The tool or holder cannot safely access the transition region.
Resolution
Reduce the upper process depth to the minimum approved amount needed to cut through the lip, correct the selected inputs and allowances, and verify tool and holder access before regenerating.
Problem: The lower operation leaves material at the transition between the two processes.
Possible Causes
The upper process stops above the lip bottom or leaves an unintended Z allowance.
The lower process begins below the upper process without sufficient overlap.
Different wall, floor, or stock allowances create a step between the operations.
Resolution
Compare the final Z of the upper process with the top Z of the lower process. Correct the small intentional overlap and reconcile allowances, then regenerate and inspect the transition from multiple views.
Problem: The lower Material Only toolpath is empty or removes less material than expected.
Possible Causes
The first process already removed the material within the lower process's defined region.
The lower top and bottom depths are reversed or do not intersect remaining stock.
The wrong geometry, solid, stock, setup, or coordinate system is selected.
The tool cannot fit into the remaining region under the current parameters.
Resolution
Review the simulated stock after the upper operation, verify the lower depth range and selected inputs, confirm tool access, and adjust only the process definition needed to include the intended remaining material.
Problem: Simulation and the posted program do not show the same safe transition.
Possible Causes
The simulation did not include both active operations in order.
The posted operation selection differs from the simulated selection.
Post-processor logic changes clearances, feeds, cycles, or motion between operations.
Resolution
Regenerate and simulate the same active operations that will be posted. Compare operation order, Z depths, links, clearances, tool changes, and feed commands in the NC output. Stop and request post support for any unexplained difference.
Additional Information
Material Only scope: The VoluMill documentation states that Material Only uses remaining material from prior supported 2D operations, supports custom stock and common endmill or form-tool types, and does not support undercutting tools. These are separate limitations from the inability of 3-axis milling to recognize undercut stock.
Related Articles
- How to Machine Pockets from Outside In
- Recommended Simulation Settings
- How to Set Fixture Avoidance
- Extracting Geometry from Solids
Explore More from CAMCO
Visit the CAMCO website to learn more about:
Keywords
GibbsCAM, VoluMill, Material Only, Cutting Air, Air Cutting, Undercut Stock, Lip, Overhang, Remaining Material, Rest Machining, 3-Axis Milling, Stock Options, Use Stock, Process Order, Z Depth, 2D Operation, Toolpath Verification