
Summary
This article explains how to download, install, and launch GibbsCAM on a Windows computer. It also covers important pre-installation recommendations, upgrading from previous versions, and post-installation tasks such as registration and migrating settings.
Table of Contents
Applies To
GibbsCAM Version(s): Current Supported Versions (2026 and later)
Operating System: Windows 10 (64-bit) and Windows 11 (64-bit)
Before You Begin
Before installing GibbsCAM, verify the following:
Your computer meets the current Hardware and System Requirements.
Windows is fully updated with the latest service packs and updates.
Your graphics card uses the latest manufacturer-certified driver.
You have local Administrator privileges.
You have your Product Code available for registration.
If using a removable hardware key license, connect the hardware key before starting the installation.
Important: If installing GibbsCAM across a network on a computer that has never had GibbsCAM installed, install the hardware key drivers before connecting the hardware key to help avoid driver-related installation errors.
If You Already Have GibbsCAM Installed
Before installing a newer version:
Do not uninstall your existing version unless instructed by CAMCO Support.
Multiple versions of GibbsCAM can coexist on the same computer.
Opening and saving a file in a newer version may prevent it from being opened in an older version.
If you need backward compatibility, use File > Save a Copy to save the part in an earlier supported version.
After installation, run the Migration Tool before launching the new version to transfer your settings and preferences.
Installation Procedure
Step 1 – Download GibbsCAM
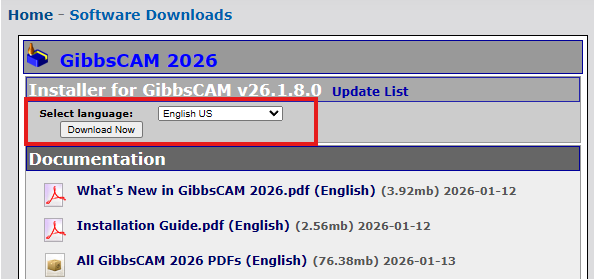
Download the latest GibbsCAM installer from the official GibbsCAM Online portal.
https://online.gibbscam.com/Select the installer that matches your preferred language.
Click “Download Now”
Step 2 – Run the Installer
Locate the downloaded installer.
Right-click the installer and select Run as administrator.
If Windows User Account Control (UAC) prompts for permission, select Yes.
Step 3 – Follow the Installation Wizard
The installer will guide you through the installation process.
During installation:
Click Next.
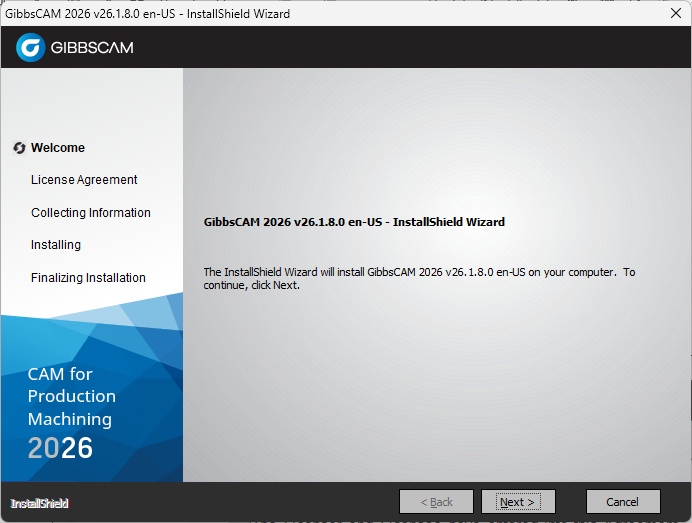
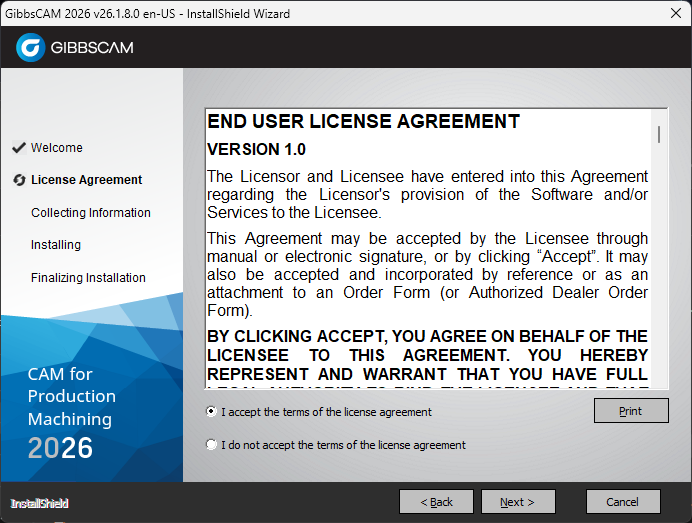
Accept the license agreement.
Install optional CAD translators and add-ins.
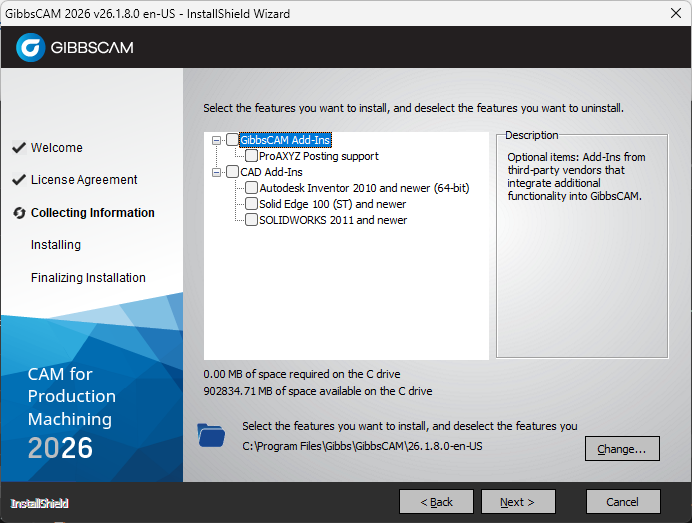
Select the installation location (if different from the default).
Install the GibbsCAM base application.
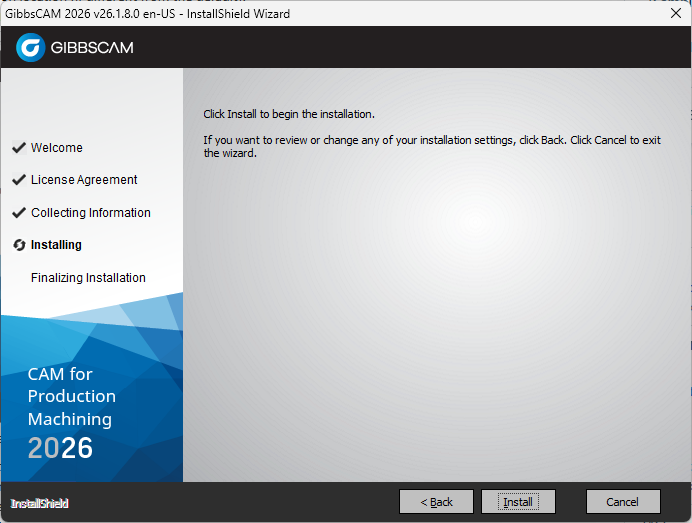
When installation completes, the installer automatically installs:
GibbsCAM application files
PDF documentation
Default Reporter templates
Default engraving fonts
Desktop shortcut
Step 4 – Complete the Installer
After installation finishes:
Click Finish to close the installer.
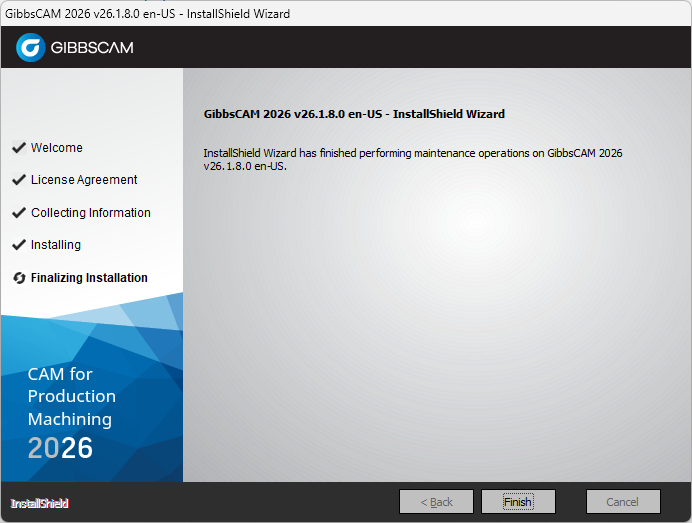
If prompted, restart Windows.
If upgrading from an earlier version, launch the Migration Tool before starting GibbsCAM for the first time.
Launching GibbsCAM
You can start GibbsCAM by:
Selecting Start > GibbsCAM
Double-clicking the GibbsCAM desktop shortcut
Double-clicking a supported GibbsCAM (.vnc) file
The first time GibbsCAM starts, the License Installation dialog appears if a valid license has not yet been installed.
Registering Your License
After installation, complete the appropriate registration procedure based on your licensing method:
Online Registration (recommended)
E-Mail Registration
Offline Registration
Network License (NLO)
Registration is required before GibbsCAM can be used.
Installing Multiple Versions
GibbsCAM supports installing and running multiple versions on the same computer.
This is useful for:
Supporting customers using different releases.
Testing new software versions.
Maintaining compatibility with existing projects.
Note: Parts saved in a newer version of GibbsCAM may not be compatible with older releases. Use File > Save a Copy > select version when working with customers or machines that require an earlier version.
Understanding GibbsCAM Data Locations
GibbsCAM stores information in three primary locations:
If you customize Reporter templates, MDDs, posts, or other shared resources, use the Migration Tool when upgrading to preserve your customizations.
Expected Result
After installation and registration:
GibbsCAM launches successfully.
Your licensed modules are available.
The software is ready for use.
Related Videos
Troubleshooting
Problem: Installation Ends Prematurely
See:
Error: "Installation Ended Prematurely"
Problem: Hardware Key Is Not Detected
Verify:
The correct hardware key drivers are installed.
The hardware key is connected.
Windows recognizes the USB device.
Problem: Registration Dialog Appears Every Time GibbsCAM Starts
A valid license has not yet been installed.
Complete the appropriate registration procedure.
Problem: Previous Settings Are Missing
Run the Migration Tool to migrate settings from the previous GibbsCAM installation.
Best Practices
Always install the latest Windows updates before installing GibbsCAM.
Update graphics drivers using the hardware manufacturer's latest certified driver.
Keep previous GibbsCAM versions installed until the new version has been verified.
Use the Migration Tool instead of manually copying configuration files whenever possible.
Maintain backups of custom posts, machine definitions, Reporter templates, and macros before upgrading.
Related Articles
- Download GibbsCAM
- Hardware and System Requirements
- Error: "Installation Ended Prematurely"
- How to Perform a Silent Installation or Uninstallation of GibbsCAM
- Installing Hardware Key Drivers
- Online Registration Guide (Hardware-Locked Licenses)
- Offline Registration Guide (Hardware-Locked Licenses)
- How to Migrate Settings from a Previous GibbsCAM Installation
- Network License (NLO) Server Setup
Keywords
Install GibbsCAM, GibbsCAM Installation, Setup, Installation Wizard, Install Software, Upgrade GibbsCAM, Migration Tool, Multiple Versions, Hardware Key, Network License, Windows Installation